Showing posts with label Winter. Show all posts
Wednesday, December 9, 2015
Winter Villages
This is a great seasonal art lesson, perfect for grades K-3. To begin, we read the book The Snowy Day by Ezra Jack Keats and we discussed some of the similarities between the character's snow day and our snow days. Next, students wrote about their favorite thing to do on a snow day. We used gray paper for this project because the long winter days in the Mid West are filled with mostly gray skies. To begin, I demonstrated drawing houses using basic shapes. We colored the houses with regular Crayola crayons and used a lot of pressure while coloring so the colors would look as bright as possible on the dark paper. Next, we tore white paper to create the texture of fluffy snow. The torn paper was glued under the houses and between the houses to create depth. Lastly, we used white paint add snow on the top of the houses, trees, chimneys, and in the sky! The students did a great job on this project, and it looks even better with iridescent glitter sprinkled on the top!
Labels:
1st Grade
,
2nd Grade
,
Art and Literature
,
Art and Writing
,
Kindergarten
,
Winter
Monday, January 14, 2013
Torn Paper Snowmen
This is the second year that I've done this project with my 2nd graders (which is rare due to the fact that I hardly ever repeat art lessons). Once a year, on a very good day, when I have lots of energy for clean-up, I bring out the chalk pastels. For this project, we used shades of blues, purples, whites, and grays to create a nighttime winter scene. I introduce them to the 'horizon line' to divide the sky from the ground. We color the snow with white & light blue first so our fingers are still moderately clean. Then, we use dark colors for the sky. After we are all washed-up and clean, we use white paper to tear three different sizes of circles...1 small, 1 medium, & 1 large. We talk about the texture of torn paper resembling the fluffy, soft snow. And lastly, we add buttons to the snow people and dots of glue for the glittery snow! Here are a few great examples:
Labels:
2nd Grade
,
Chalk Pastels
,
Collage
,
Mixed-Media
,
Seasonal
,
Winter
Friday, December 14, 2012
Snowflake Collages
I really love projects involving snowflakes because of the technical, mathematical aspect. Now, I will admit the ONLY mathematical theories that I enjoy are those involving symmetry and shapes...that's it! So, to introduce this lesson, we always begin with an overview of symmetry and rotational symmetry. By this point in the year, 3rd-6th graders are pretty familiar with the concept of symmetry so I'm basically just reinforcing what they already know and giving them a hands-on approach to further stretch their knowledge on the subject. I showed the class several different examples of snowflake designs that I found on the ever-handy Google Images. Next, I passed out strips of paper that measure 6" long and 1/2" wide. They are encouraged to start the snowflake by gluing strips of paper in an X and putting one or two more strips of paper through the middle of the X both horizontally and vertically. Now the fun begins. I show them how to cut the strips into little pieces to add details to their snowflakes. I reinforce that each line has to be the SAME in order for the snowflake to remain SYMMETRICAL. Here are a few great examples from 4th grade:
By Mary Jane
By Gabby
Labels:
3rd Grade
,
4th Grade
,
5th Grade
,
6th Grade
,
Collage
,
Rotational Symmetry
,
Seasonal
,
snowflakes
,
Winter
Thursday, December 13, 2012
Penguins!
It's getting COLD here in the Midwest...finally. We've had a very nice and mild fall and I am hoping for snow!!! One way to wish the sparkling white stuff upon us is to incorporate it into our artwork. First, let me apologize for neglecting you for so many weeks. I got out of the habit of blogging and before I even realized it, I had let more than a month slip by without posting. I have to admit, however, that Pinterest has taken over my life. It's been so very helpful organizing my art lesson plans. I just pull up the image of the artwork, type out my objective, put it on my projector, and away we go. I promise to keep up with my posting here, as well, for all of my faithful followers (if there are any of you left, lol).
This is a version of a collage that we made last year. I did this with my 2nd graders this year. We watched a few You Tube videos on Penguins to get us inspired. Next, we cut out the shapes to make the body, wings, & earmuffs. Lastly, we painted snowflakes falling on our paper with white paint.
Here are a few great examples:
By Anna Rose
By Marvella
By Lauren
Thursday, January 19, 2012
Metallic Winter Trees
I know tree silhouettes tend to be overdone from time to time. But...I just think they're beautiful! I also think they are one of the most simple things to draw with the most beautiful results. So, I gave each one of my 6th graders a 6x8" piece of paper and showed them how using line variations and overlapping the lines can be quite easy. Next, the amazing part came. I let them each use a SILVER MARKER! They were very excited and tried extra hard so their drawings would turn out just beautiful. After we colored in the trees & added falling snow, the students used watercolor right over the marker drawings. I told them they could 1 color + black so it looked like nighttime. Here are a few examples:
India's Tree
Christopher's Tree
Labels:
6th Grade
,
Line Drawings
,
Metallic Markers
,
Seasonal
,
Trees
,
Winter
Tuesday, January 17, 2012
Penguins, Polar Bears, & Snowmen!
Well, it finally decided to look like winter here in the Midwest. So, what better way to ring in the season than to make some winter animals! I got this adorable lesson from Mrs. Haake over at Apex Art, http://apexart.blogspot.com/2012_01_01_archive.html.
I loved all of the bright colors! After 2 classes of penguins, however, I needed to mix-it up and add some other creatures. So, we used the same concept of cutting specific shapes by making Polar Bears & Snowpeople. To make the lesson go smoothly, I had pre-cut paper at each student's seat. For example, I had the 10x10 background, a 9x9 white or black paper (depending on the animal), colorful 3x3 squares for the earmuffs, & strips of colored paper for the scarves.
Here are some of my student examples:
Kennedy's Penguin - 2nd Grade
Grace's Penguin - 3rd Grade
Destiny's Polar Bear - 2nd Grade
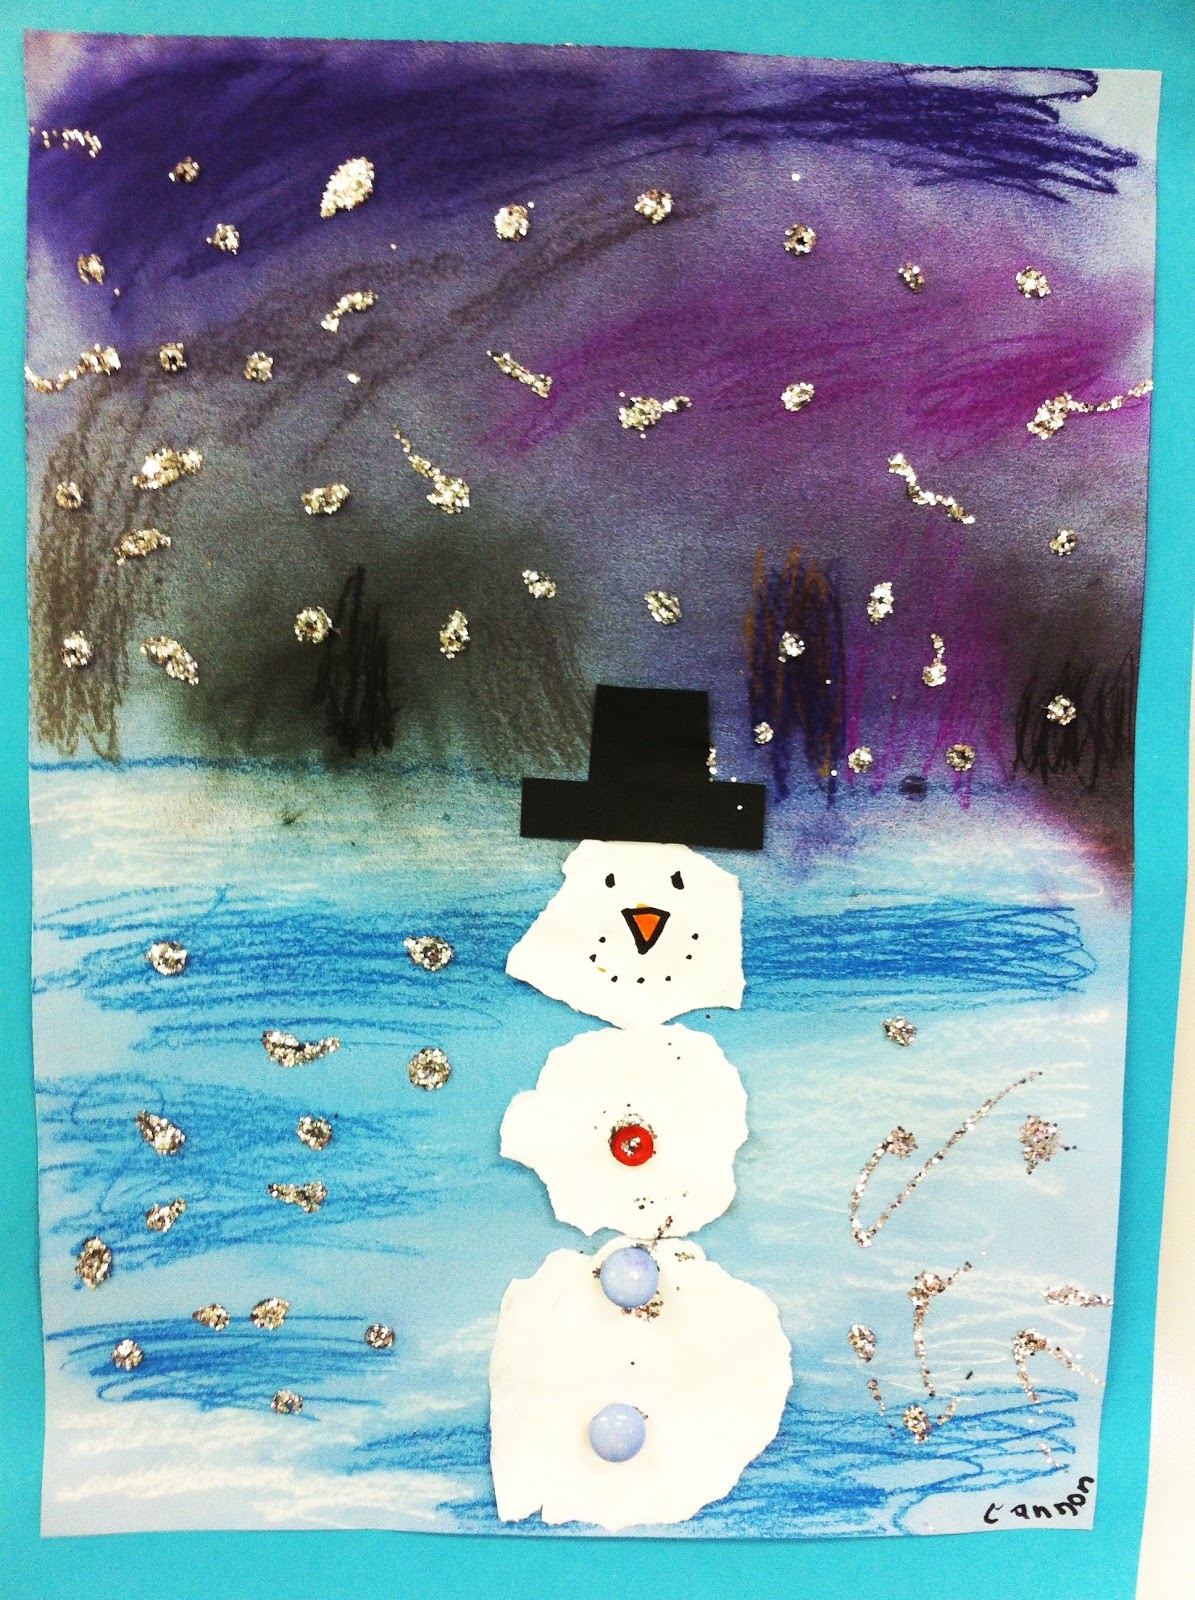
Caleb's Snowman - 3rd Grade
Martha's Snowman - 3rd Grade
Wednesday, December 8, 2010
Magazine Christmas Trees
I am officially addicted to making Magazine Christmas trees! I have had loads of magazine donations this year, thanks to my supportive staff members here at Halls Ferry. Some magazines I can use with the kids and other magazines that I didn't know what to do with (like 50 copies of the November issue of Missouri Conservation???) and I am so glad I saved them for a project such as this.
I can't take claim for this project, whatsoever! I have to thank Martha Stewart and her video for my new addiction. This project would work well with students because it's so easy to do. Check out the video at http://www.marthastewart.com/article/magazine-christmas-trees
They can be painted gold like these...or left unpainted and sprinkled with glitter (which I'm going to do). I'm making these for all the staff here at school for Christmas gifts, shhhh don't tell!
Labels:
4th Grade
,
5th Grade
,
6th Grade
,
Recycled Art
,
Winter
Tuesday, December 7, 2010
Welcome to Snowmen Week!
There has been a longstanding tradition at our school (thanks to the past art teacher's creativity...none of which I will claim here), Model Magic Snowpeople. It's a fun, easy project to do, and the kids expect it every December because they bring them home and give them as gifts to their loved ones.
The main objective for this project is to create a mini-snowman sculpture that can either be displayed on its own, or used as an ornament. Students can change the color of the model magic by dabbing watercolor markers into the clay and mixing it around. There are endless possibilities for details that can be added to these snowpeople, and the students really get creative when making them unique.
Here are just a few snowpeople that were made this year...
Wednesday, December 1, 2010
Handprint Snowflakes (2nd edition)
Okay, you caught me...I tend to stick with a theme for the week and then move on to bigger and better things when I've gotten to the point where I don't want to see another snowflake until next winter! Yes, this is Snowflake week...stay tuned for Penguin week...Clay week...Snowman week...etc. I used to do different themes with different classes, but then they would see their friends in other classes doing certain projects and get disappointed when they don't get to make it.
For this project, I decided to let the older kids (3rd & 4th) show some responsibility in putting paint on their own hands to use as a stamp. If I did this with the younger kids, I would do the paint application myself. Of course, I did have to go over some things NOT to do with the paint (a little pre-correct), and I also saved the stamping part toward the end of class, after they have done the drawing part of the project.
I drew several examples of snowflakes on the board, discussing each one's radial symmetry and the use of lines and shapes to make a snowflake. The students used contrasting markers/colored pencils on the frame and the inside of the paper. I think they turned out fabulous! And, I resisted the urge to sprinkle glitter on them - my custodian is getting a little upset with all of the glitter in the building (I'll have to bake him a nice batch of Christmas cookies this year).
Tuesday, November 30, 2010
Handprint Snowflakes
This was a fun and easy project for little hands! First of all, we discussed the shape that would best represent a snowflake. We also talked about other shapes and lines that we can really see in a snowflake, lines, circles, triangles, etc. I had an array of cool-colored paper on each table and demonstrated how to trace my hand with a pencil and cut it out (very carefully). After each student had 6 hands cut-out, I demonstrated how to arrange the hands in a circle to represent a snowflake. I also encouraged the students to cut a shape out of the middle of the hand to add another shape to the overall snowflake. When completed, I added the glitter on top of the snowflakes and displayed them on our wall of windows in the stairwell.
Monday, November 29, 2010
Winter Time Is Here...
I love this time of year! There is soooo much glitter that the floor sparkles, students sparkle, and I have to bribe the custodian to stay on my good side while he cleans it up :) Our "theme" this holiday for the foyer of our school is blue and silver snowflakes. So, I came up with some art lessons that would coordinate with the decor. This was a winter landscape project I did with Kindergartners. It was very simple and addressed sorting by size, drawing simple shapes, and recognizing shapes in nature. First, the students drew the snowdrift with a white oil pastel. Next, they were instructed to cut small, medium, and large triangles and stack them one on top of another to create an evergreen tree. I stayed away from the "Christmas tree" language for this project because some students do not celebrate Christmas...but here in Missouri, we all celebrate winter. When each student had at least three trees on their paper, I gave them a silver metallic marker to stamp some dots of snow falling on their paper. I think they turned out beautiful!
Subscribe to:
Posts
(
Atom
)


