
Showing posts with label 3-D. Show all posts
Showing posts with label 3-D. Show all posts
Friday, April 26, 2013
3-D Paper Rainbows
Is this not THE MOST ADORABLE art project you have EVER seen? (Ok, I get a bit overly excited about rainbows, lol). This was a project I did with my Kinders yesterday. We sorted the paper strips, compared the sizes, ordered them from least to greatest, and used patterning. Whew! Let me say, it did take the entire hour of art class for these creations, but it was worth it! You start with an 18" red strip and decrease the size by 1.5" for each color until you end with the pink strip. Doing this, it causes the paper to bend into that fabulous arc. You should definitely give this project a try!


Thursday, May 3, 2012
Wire Bird Sculptures
I found this lesson at Stuck in the Mud Pottery and really wanted to try it out with one of my classes. Here is a link to her original lesson: http://stuckinthemudpottery.blogspot.com/search?q=soda+can


I decided to tackle this project with my 5th grade students because they are a very creative group of kids. I think they did really well with the form for their birds so far. Basically, I told them to create a "yarn ball" with their wire; a large one for the body & a small one for the head. Next, I showed them how to attach the head to the body, add legs, a tail, and a beak by bending the wire. The legs attach best if you feed them through the body, having them actually attach to the top of the back. This seems to give it more strength. I have an endless supply of these cedar blocks, so I poked holes through the wood, added hot glue, and stuck the ends of the wire through the holes.
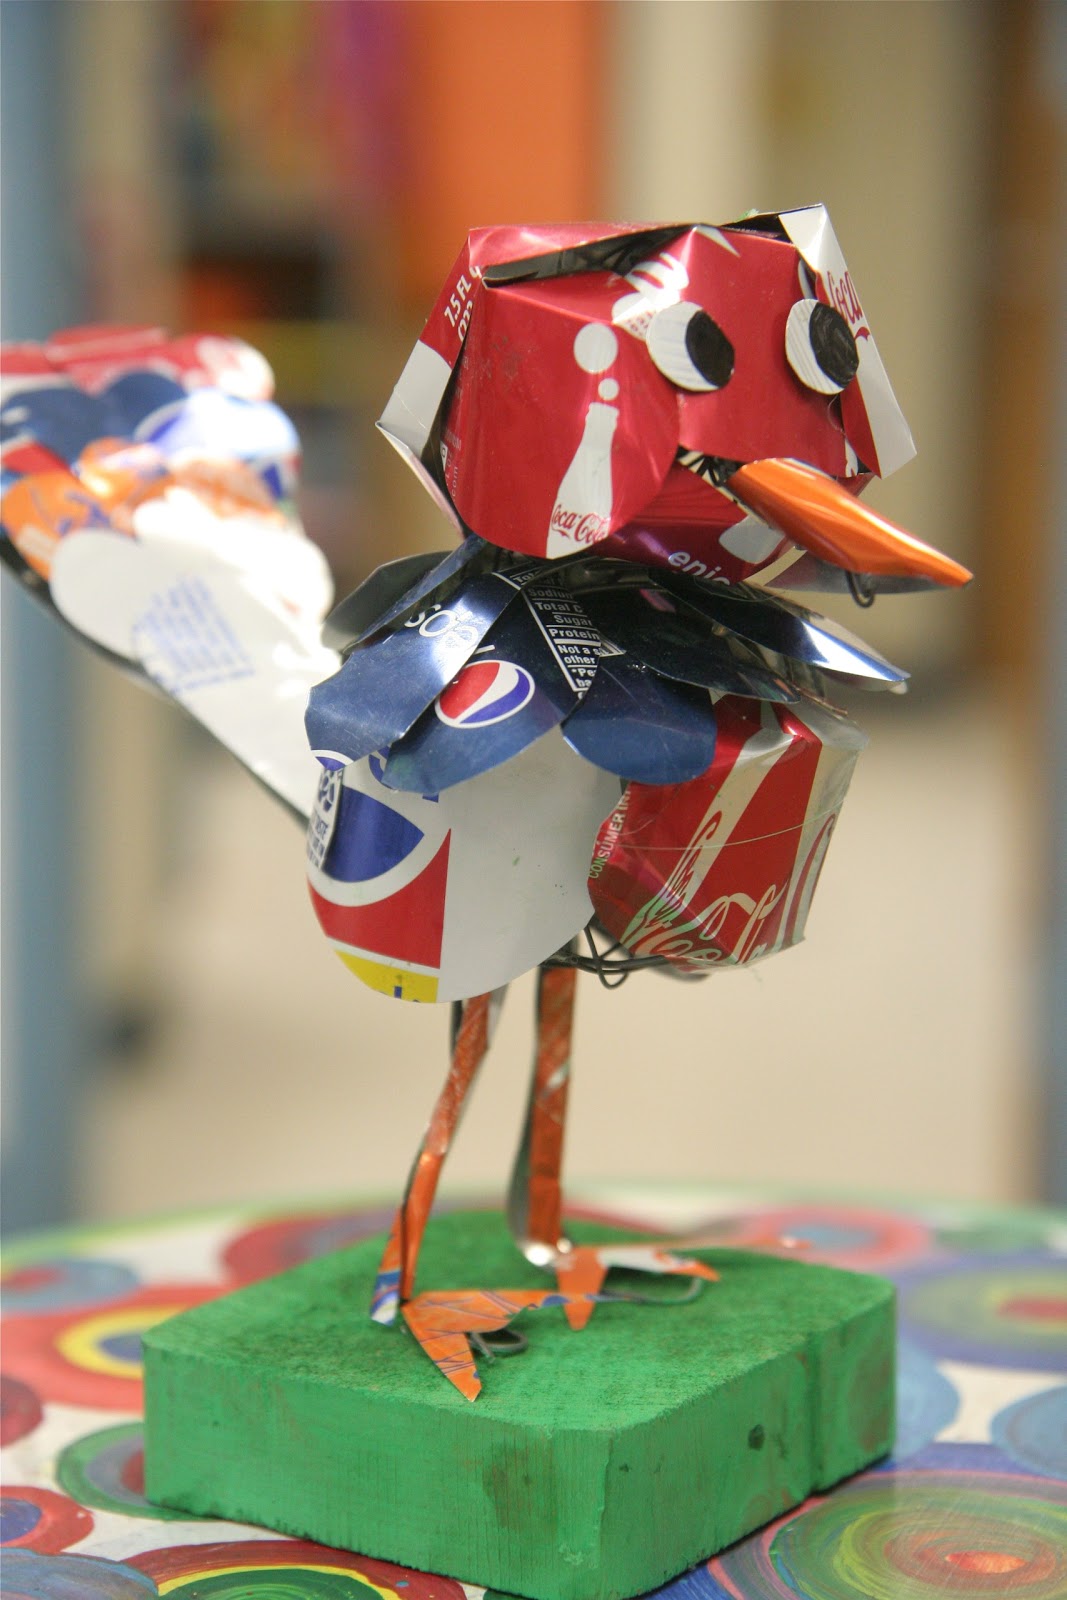
Next class period, I will have the students finish the birds by adding colorful soda can feathers. I had the aluminum pre-cut for the students so all they have to do is cut out some large tear-drop shapes for the feathers. I found that some of the aluminum can simply be bent into shape without the use of hot glue. However, most of the feathers and details will have to be added with a glue gun. I have 2 in my classroom and I do the majority of the gluing and I use a good amount of discretion before letting the students use the hot glue gun by themselves.
I will post pictures next week of some finished pieces (hopefully).
Here is my teacher sample:
And here are the wire bird sculptures before we had to chance to add the soda can feathers:

I decided to tackle this project with my 5th grade students because they are a very creative group of kids. I think they did really well with the form for their birds so far. Basically, I told them to create a "yarn ball" with their wire; a large one for the body & a small one for the head. Next, I showed them how to attach the head to the body, add legs, a tail, and a beak by bending the wire. The legs attach best if you feed them through the body, having them actually attach to the top of the back. This seems to give it more strength. I have an endless supply of these cedar blocks, so I poked holes through the wood, added hot glue, and stuck the ends of the wire through the holes.
Next class period, I will have the students finish the birds by adding colorful soda can feathers. I had the aluminum pre-cut for the students so all they have to do is cut out some large tear-drop shapes for the feathers. I found that some of the aluminum can simply be bent into shape without the use of hot glue. However, most of the feathers and details will have to be added with a glue gun. I have 2 in my classroom and I do the majority of the gluing and I use a good amount of discretion before letting the students use the hot glue gun by themselves.
I will post pictures next week of some finished pieces (hopefully).
Monday, April 30, 2012
Fine Arts Fair Prep
I have been neglecting my blog this past month because I am getting ready for our Fine Arts Fair in a couple of weeks, as I am sure you are too! Although, I hope you are less stressed about it than I am. For some reason, I have this innate desire to out-do myself every year. So, this year, I am having my students display one 2-D and one 3-D piece of art for the event. I also planned each and every class to have a separate 2-D and 3-D work of art so there are no classes with the same project. That's a grand total of 36 different lessons and 600 pieces of artwork that needs to be finished, presentable, and displayed by May 15th. Whew!! And of course I have left ALL 300 3-D sculptures for the month of April, that's what I do best...wait until the last minute. So, here are a sampling of the lessons we have been working on this past month.


4th Grade Origami Flowers

The 4th graders have created glue-line relief flower paintings in the style of Georgia O'Keefe, so I thought some flower sculptures would compliment the paintings nicely. I walked them through the step-by-step process of folding each flower petal and I hot-glued the petals together when they were complete. I also added a dowel rod for the stems and a wood block so the flowers could stand tall. I will also have the students paint the stems & base green and add some leaves next class period. I used a collection of buttons for the center of the flowers.
2nd Grade Ceramic Cloud Mobiles w/ birds

I want to give credit to the Etsy artist who inspired these cloud mobiles. You can find her work here: almapottery, http://www.etsy.com/listing/49331222/sale-price-adjusted-rain-cloud.
We started out with a slab of clay and I had my students roll the slab until they had even consistency. Next, they cut out the cloud shape and saved their scraps of clay to make the birds. They poked three holes in the bottom of the clay and one at the top for the strings. The next class period (after the clay has been fired), I helped them hot glue the beads along their strings and they painted the clouds and the birds. I had to spend a lot of my free-time attaching the birds to the strings and attaching a wire at the top of the clouds so they can hang. But, I think they turned out pretty well!

3rd Grade Stamped Ceramic Pendent Necklaces

This was a really fun project to do with 3rd graders! I showed them how to pinch off a small piece of clay, flatten it out into a round disk, and stamp the bottom of their shoe on the clay to get the texture. This was neat because everyone's shoes had different patterns on the bottom. Some even had the name brand stamped on like the one above. After they were fired, I had the students paint them using acrylics and I helped them hot glue the string to the pendent and attach the beads.
2nd Grade Q-Tip Colorful Dandelions

I was inspired by an Anthropologie photo that I saw on Pinterest using q-tips to make dandelions. Of course, I couldn't leave the q-tips white! All you need are enough styrofoam balls for each person and q-tips cut in half. I thought 1,000 q-tip halves would be enough for one class, but I definitely could have used more! Again, I used dowel rods and wood blocks. Maybe we'll make some leaves for these, too?
Wednesday, November 30, 2011
Construction Paper Pine Trees
I am reposting this project from last year. If you are like me...you are swamped with demands for backdrops, hallway decor, holiday programs, and much more!!!! I do this project every year because I just LOVE the results and I know that you will too.
This project works great for grades 2-6. First of all, we discuss the shape of an evergreen tree in it's 2-D form (if we were drawing it). Then we discuss the 3-D form of a triangle...the cone. Next, I demonstrate how to make a cone out of green construction paper, make 'fringe' on the edges to resemble pine needles, and stack cones in various sizes to make the tree taller. Lastly, I make a mixture of white paint, glue, and water and let the kids splatter some snow and glitter on top of their trees.

This project works great for grades 2-6. First of all, we discuss the shape of an evergreen tree in it's 2-D form (if we were drawing it). Then we discuss the 3-D form of a triangle...the cone. Next, I demonstrate how to make a cone out of green construction paper, make 'fringe' on the edges to resemble pine needles, and stack cones in various sizes to make the tree taller. Lastly, I make a mixture of white paint, glue, and water and let the kids splatter some snow and glitter on top of their trees.

Subscribe to:
Posts
(
Atom
)