This is a great project to do with 5th and 6th graders! Kids at this age feel very self-conscious about their drawing skills, so giving them a project where the end result is SUPPOSED to look funny is a win-win! Thanks to all of my friends who have donated magazines to the Art Room, especially the ESPN magazines (the boys LOVE them). I started by showing the first photo (thanks to a project I found on Pinterest). We talked about sizes, proportions, texture, details, and how to integrate all of those things into one great work of art.
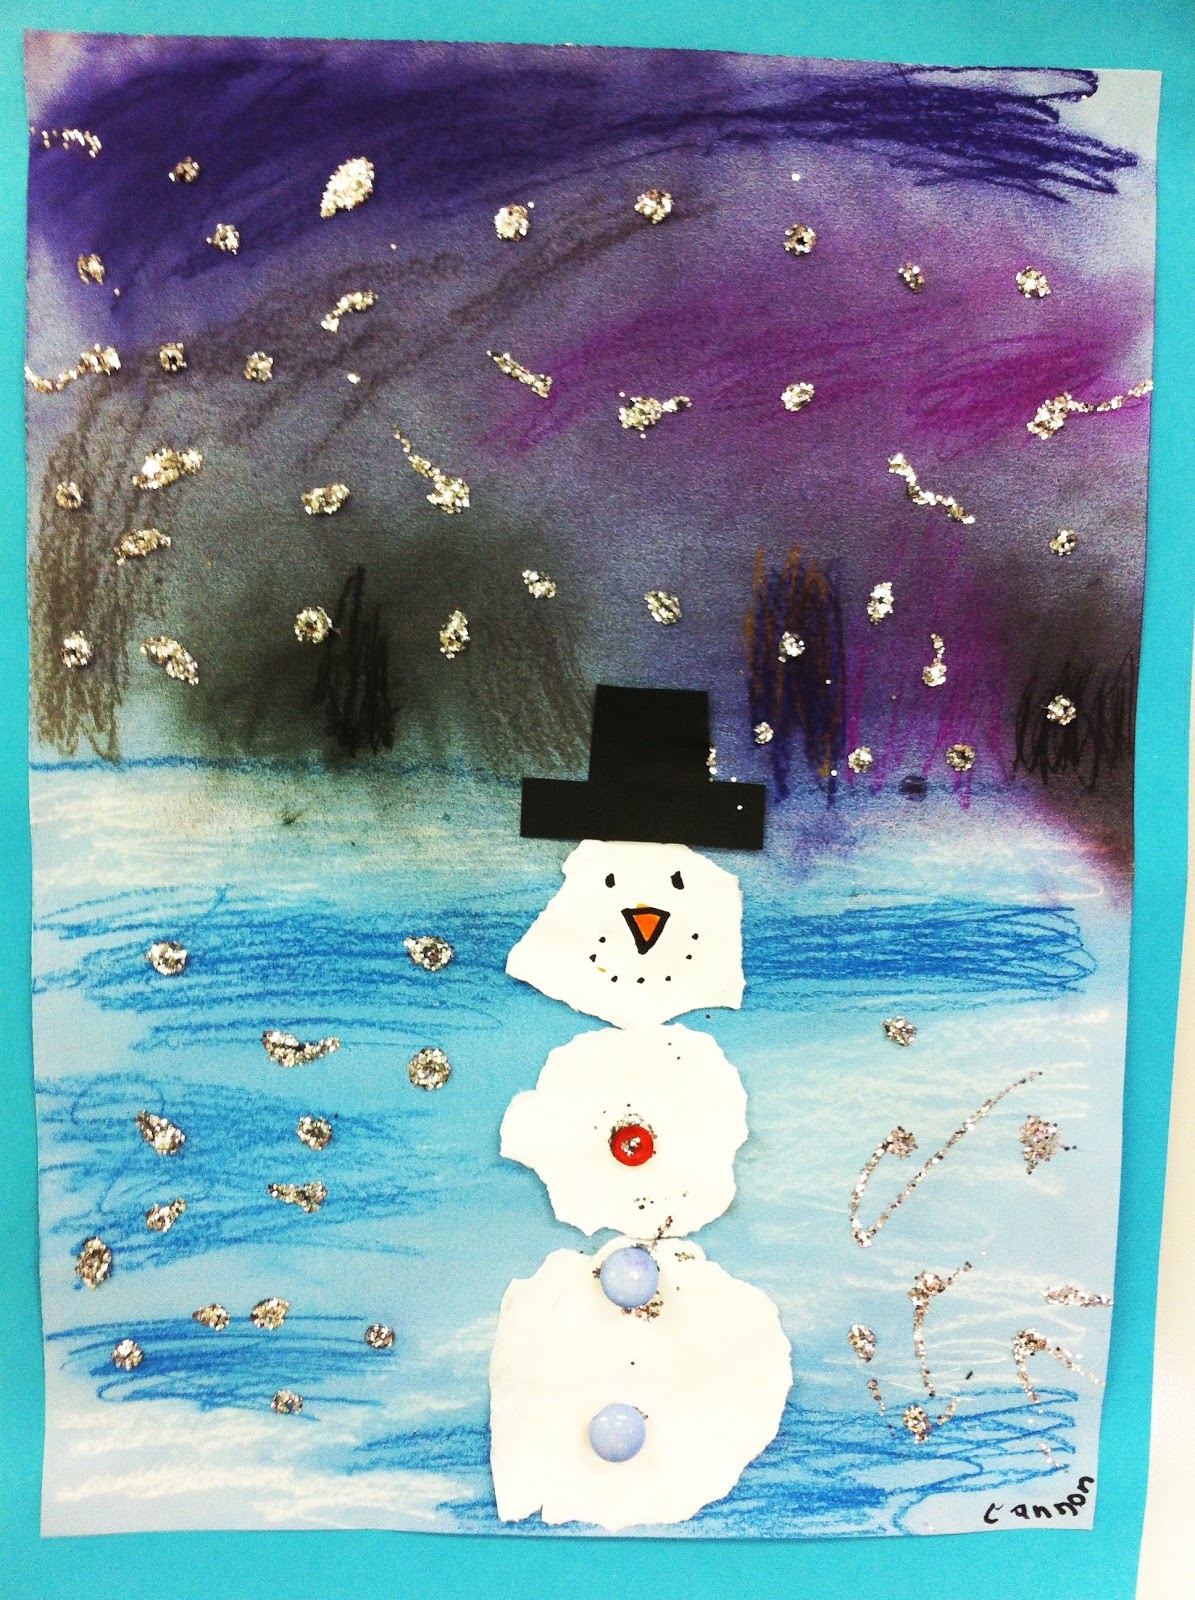
This is the second year that I've done this project with my 2nd graders (which is rare due to the fact that I hardly ever repeat art lessons). Once a year, on a very good day, when I have lots of energy for clean-up, I bring out the chalk pastels. For this project, we used shades of blues, purples, whites, and grays to create a nighttime winter scene. I introduce them to the 'horizon line' to divide the sky from the ground. We color the snow with white & light blue first so our fingers are still moderately clean. Then, we use dark colors for the sky. After we are all washed-up and clean, we use white paper to tear three different sizes of circles...1 small, 1 medium, & 1 large. We talk about the texture of torn paper resembling the fluffy, soft snow. And lastly, we add buttons to the snow people and dots of glue for the glittery snow! Here are a few great examples:
I really love projects involving snowflakes because of the technical, mathematical aspect. Now, I will admit the ONLY mathematical theories that I enjoy are those involving symmetry and shapes...that's it! So, to introduce this lesson, we always begin with an overview of symmetry and rotational symmetry. By this point in the year, 3rd-6th graders are pretty familiar with the concept of symmetry so I'm basically just reinforcing what they already know and giving them a hands-on approach to further stretch their knowledge on the subject. I showed the class several different examples of snowflake designs that I found on the ever-handy Google Images. Next, I passed out strips of paper that measure 6" long and 1/2" wide. They are encouraged to start the snowflake by gluing strips of paper in an X and putting one or two more strips of paper through the middle of the X both horizontally and vertically. Now the fun begins. I show them how to cut the strips into little pieces to add details to their snowflakes. I reinforce that each line has to be the SAME in order for the snowflake to remain SYMMETRICAL. Here are a few great examples from 4th grade:
It's getting COLD here in the Midwest...finally. We've had a very nice and mild fall and I am hoping for snow!!! One way to wish the sparkling white stuff upon us is to incorporate it into our artwork. First, let me apologize for neglecting you for so many weeks. I got out of the habit of blogging and before I even realized it, I had let more than a month slip by without posting. I have to admit, however, that Pinterest has taken over my life. It's been so very helpful organizing my art lesson plans. I just pull up the image of the artwork, type out my objective, put it on my projector, and away we go. I promise to keep up with my posting here, as well, for all of my faithful followers (if there are any of you left, lol).
This is a version of a collage that we made last year. I did this with my 2nd graders this year. We watched a few You Tube videos on Penguins to get us inspired. Next, we cut out the shapes to make the body, wings, & earmuffs. Lastly, we painted snowflakes falling on our paper with white paint.
We had already been working on positive and negative space for two weeks prior to this lesson. Here is an example of the first lesson that we worked on:
Once they understood the concept of cutting out a shape along an axis and flipping it over to the other side to create a mirror image, we were ready for bugs.
I actually found this lesson on Pinterest. Here is the link to the post from Pinterest (the photo does not go to a blog or credit a teacher, but I wanted to post where I found it): http://pinterest.com/pin/44543483785160136/. We started the lesson by looking over a handout I made showing the shapes of various types of bugs. I demonstrated how to draw half of a bug on each edge of a white rectangle. I also emphasized that each but needs to be cut-out VERY NEATLY! Make sure to tell them that they are saving both the bug and the background piece so they can't 'over cut' or cut around the shape and cut the details later. After they cut out the large shape of their bug, they needed to cut a small shape out of the body. Next, they flipped the shape along the line of symmetry to create a positive and negative image. Good luck!! The results are quite stunning when put on display.
I began our lesson on Symmetrical Insects by showing the students this video I found on You Tube:
It's an adorable short video with a catchy song that the kids really enjoyed!
We worked together on our insects. I demonstrated how to fold small squares of paper in half and cut out a shape so that it will be symmetrical. We brainstormed many other details that we could add to our bugs. Some of the students were coming up with some really creative additions. Here are a few snapshots that I took using my iPhone:
This is a cute, one-day lesson I found over at davinciswings.blogspot.com. I had pinned this lesson months ago and decided since Spring has sprung and the bugs will be out...what better time to do symmetrical bugs? Also, the 2nd and 3rd graders are working on lines of symmetry. So, we discussed examples of things around the room and in nature that are symmetrical. I drew several shapes on the board and the students agreed on which ones were symmetrical and which ones were not. And, lastly, I showed them examples from Da Vinci's Wings so they could see some student work.
(I have no idea why this is in italics, but just go with it...my 'I' button is not working at the moment...)
I have been neglecting you these past few weeks, and I apologize. I have no good excuse, other than the fact that we have been diligently preparing for our Black History program and for Read Across America week.
Here are some finished collages inspired by the beloved Romare Bearden:
Dexter - 6th Grade
Sophia - 6th Grade
Courtland - 6th Grade
Mallory - 6th Grade
Darrion - 6th Grade
Diamond - 6th grade
We worked for the past THREE weeks on our collages. And still some students did not finish! I know every time I teach this lesson that it will take forever and a day to finish, but I know that the results are stunning. I love studying Bearden because it gives students the chance to see the work of an artist who was inspired by music, art, and theater. It also showcases his desire to imitate the environment in which he lived. For this lesson, I had the students create a place that represents their own live. Some examples I gave were school, their home, church, outside, at a park, the football field, etc. Then, I made sure that they were creating their own people using parts of photographs. I discouraged them from cutting out people and gluing them down and leaving the photos in tact. This way, it forced them to think about the proportions of their people within the environment they created.
I showed this video to my kinders yesterday regarding the African landscape, climate, & animals. (I actually have a student who just moved here from Africa, so that was pretty cool.)
We named all of the different animals that we saw in the video (although I have to admit...there were a few horned creatures that I didn't know the name of, so I called them 'antelope'...ooops).
Then, we started our giraffe project. This was quite an undertaking for kinders. We had to draw the giraffe, cut it out, tear brown paper for the spots, make a moon, & cut the grass. I think they turned out very well. The lesson actually came from Patti over at Deep Space Sparkle. My teacher friend had downloaded one of Patti's units on African Themed Art Lessons and gave me a copy. Thanks Patti! Here is a link to her blog: http://www.deepspacesparkle.com/2010/12/african-art-lessons-plans/
Purchasing her lesson plans is definitely worth the $$.
Well, it finally decided to look like winter here in the Midwest. So, what better way to ring in the season than to make some winter animals! I got this adorable lesson from Mrs. Haake over at Apex Art, http://apexart.blogspot.com/2012_01_01_archive.html.
I loved all of the bright colors! After 2 classes of penguins, however, I needed to mix-it up and add some other creatures. So, we used the same concept of cutting specific shapes by making Polar Bears & Snowpeople. To make the lesson go smoothly, I had pre-cut paper at each student's seat. For example, I had the 10x10 background, a 9x9 white or black paper (depending on the animal), colorful 3x3 squares for the earmuffs, & strips of colored paper for the scarves.
These darling works of art come from a class of 2nd graders. I initially got the idea from a quilt that I saw on Pinterest. I thought wallpaper patterns would make an adorable little village! Here are some of the completed works of art:
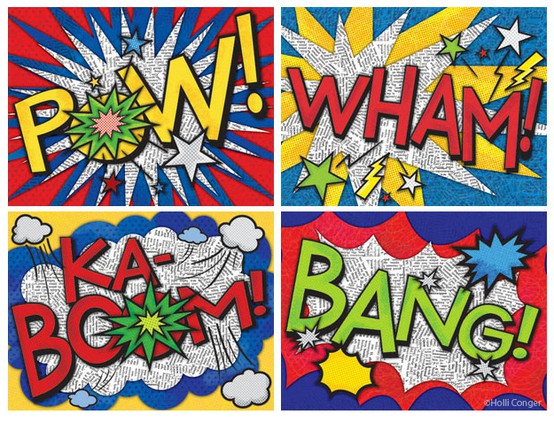
This is a fun lesson to do with those 6th graders who are just too "cool for school", lol. I showed the students this You Tube video where Batman & Robin are fighting the bad guys and on the screen are onomatopeoias (the kids LOVED it):
Next, I had my slideshow playing on my new, fancy projector. I had the definition of onomatopeoia, sample artwork, various words they could choose from, and comic book fonts. I also had this handout printed out for kids to refer to:
Here are the samples of artwork that I showed the class before we began our artwork:
And, of course, I HAD to share the art of Roy Lichtenstein with this project:
As you can see, these samples are layered with text and color, so for our assignment, students cut out black and white text from magazines and glued them all over their 9x12" paper. Then, they sketched out which word they wanted to put on their art. We used scrap paper to sketch out our ideas so they didn't mess-up their 9x12 collage work. When they were ready with their final idea, they used a sharpie marker to draw their words and details that describe their word on their paper. We didn't even get to the color part of this project yet today, but they are so excited about this one! Give it a try! If you want the slideshow, leave me a comment and I can e-mail it to you :)
Kinders learned how to cut circles this week! I gave them squares of paper and showed them how to cut and turn the paper until there are no more corners. They cut large circles, medium circles, and small circles. They overlapped the different sizes of circles on their papers. The next class period, I gave them paint and an assortment of lids to use as circle stamps. I showed them how to stamp small circles inside larger circles, how to use the stamps correctly, and how to stamp the shape on their papers.